It’s not a secret that Albion Online players can only find higher tier resources in PvP zones such as yellow, red, and black zones. New players may be fearful of these PvP areas because they don’t know what to expect when entering these top tier maps. Many new players will not leave the blue zones because they are afraid to lose their gear and hard-earned resources.
What if I told you that there was a better way to minimize your loss and increase your Albion gains while doing it safely? After reading this guide you’ll be more likely to venture out into the scary not-so-scary PvP areas of Albion Online.
PvP Zones Explained
Before we talk about what you can do to survive the different zones outside of the safe blue zones, let’s discuss the differences between the PvP zones in Albion Online.
Yellow Zone
In the yellow zones, players can flag themselves to engage in PvP activities with any other player in that zone, regardless of their status. If one of these flagged players takes you down, you’ll lose 5% durability and that player will lose reputation.
A helpful tip is to check the bottom right of your screen to see how many of these hostile flagged players are currently in this zone. Hellgates can also spawn in Yellow Zones. While in a Yellow Zone Hellgate, players that die will drop all their loot. Hellgates will not punish the killer, these instances are PvP welcome, meaning players who engage will not lose any reputation.
What resources are in yellow zones?
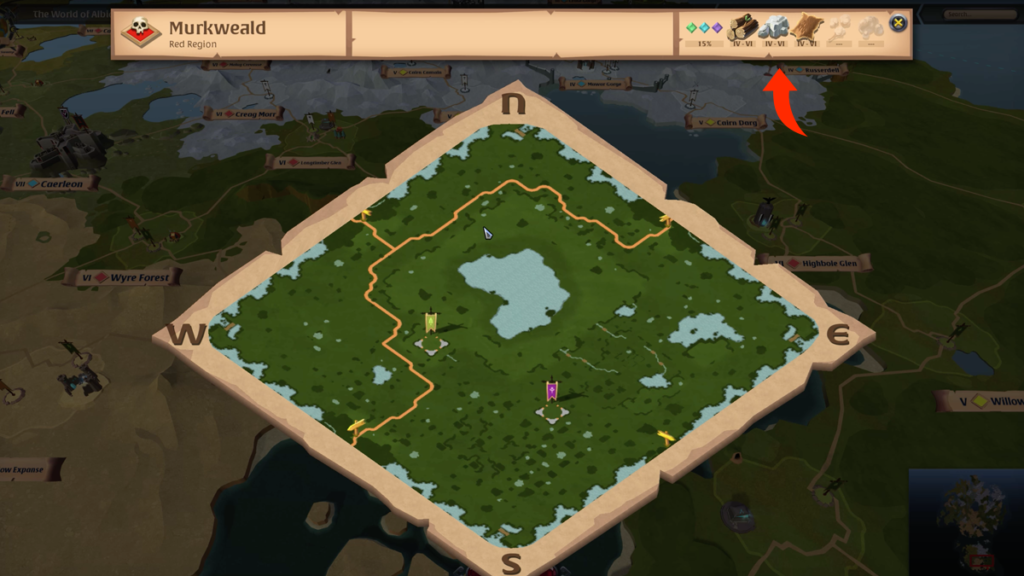
The yellow zones will have tier 1-5 resources available to adventures in that zone. While in the zone press ‘N’ to see exactly which resources are available. This can also be done while looking at the map [‘M’] by clicking a zone.
Red Zone
While roaming the red zones you will be in a full loot PvP environment which can result in the loss of gear, loot, and resources. Red zones are will still require you to flag yourself for PvP but will not result in reputation loss unless you kill an unflagged player.
What resources are in red zones?
The red zones spawn tier 1-6 resources for players to gather while dodging flagged players.
Black Zone
The black zones in Albion Online offer the highest tiered resources in the game but are full PvP zones. Death amounts to losing everything on your body and killing has no consequence. In black zones, players are automatically enrolled in PvP without having to flag themselves. Meaning, there is no loss of reputation for killing other players. This zone will be riddled with guilds and gankers looking to steal your hard-earned higher-tiered resources right from your cold lifeless hands. Best to join a guild, or have a small team of friends running around with you to help protect your gear and resources.
How to enter to a black zone?
All black zones are located in the treacherous Outlands. In order to travel to one of these black zones, you will have to use Realmgates. Realmgates are located in the outer Royal Continent cities.
What resources are in the black zones?
Those who are brave enough to travel into the black zones will have access to tier 1-8 resources that spawn. All black zones will provide an abundance of one specific resource. Open up the zone map, and view the top right corner to see which resources are spawning in your zone.
As far as Hellgates go the black zone is the same as the red zone, full loot PvP with an item power cap of 1000, anything over that cap is reduced by 50% power.
How to Survive the PvP zones
First off, this is an obvious one, but travel in a group. You look less appetizing to a group of gankers if you are a group of people instead of 1. However, we know that not all players have a large number of friends that are willing to play online games with them. With that in mind, let’s discuss some security measures you can take to ensure a safer, more abundant gathering experience while in red and black zones.
Find the Right Spot to Gather
Start by traveling to a red or black zone. Upon entering the zone of choice based on your desired resource, quickly move away from main roads while your bubble of protection is present. After you are safe, take a moment to pick a spot around 2-3 zones away from the portal.
Red zones are generally adjacent to a yellow. If at all possible try to gather in red zones with a connecting yellow zone for a quick getaway. Black zones are on a separate continent filled with only black zones, so this strategy will not be as viable for black zone gathering.
Staying Cautious (Tips)
Keep an eye on the edges of your map at all times. Player nameplates will show around the edges when a person is in proximity. Try to keep those nameplates around the edges, don’t let them get close enough to kill you. If you see a big group of red nameplates to the top right corner of your screen, run down to the bottom left. Sadly, gankers like to pool around the exit choke points, so you may want to run to a different exit to get out safely.
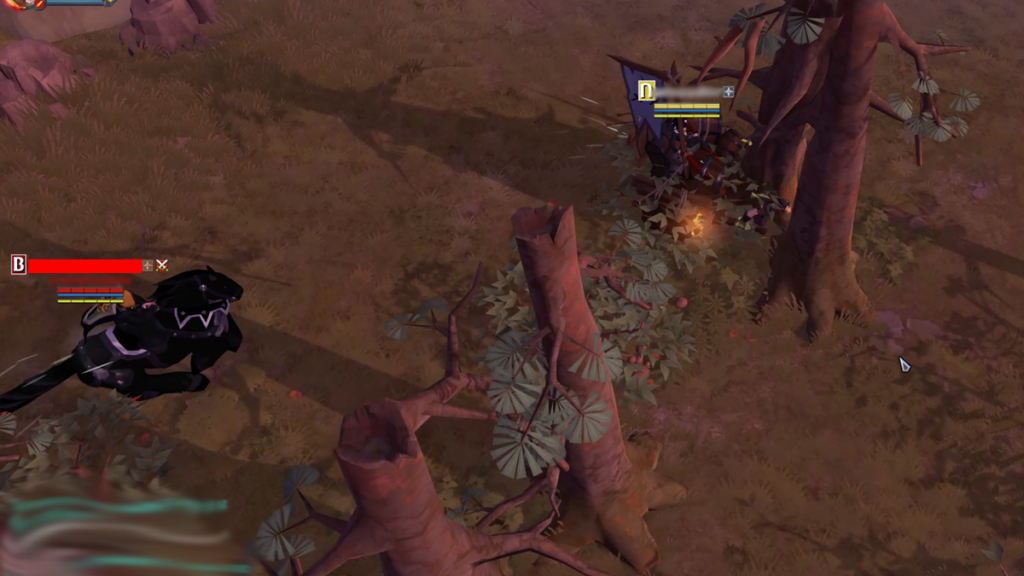
A method I like to use personally is to bait the attacker to get off their mount. These shady red tags will try and circle you, waiting for the moment to pounce. I like to circle with them and bait the dismount, making sure to keep my mount speed boost active. When the attacker finally does jump off their mount I run away immediately. Forcing them to chase me down on foot which is impossible because mounts are just faster. The only way this doesn’t work is if the attacker has a gap closer that can stun me off my mount. But this also requires them to have the foresight to jump in the direction they think your running. Best to serpentine while escaping to ensure the quick getaway.
Some of these tips may be a bit obvious, however, we felt we should include them anyway:
- Speed is key, boot buffs and fast mounts will be your ally
- Keep your mount out and ready to escape (don’t leave the circle)
- Don’t get overzealous with too many mobs at once because if you try to escape you’ll get knocked off your mount
- Don’t exceed your carrying capacity, this will make you slower
- Blue nameplates are safe, red nameplates are hostiles
- Players on mounts can not attack you without a battle mount, which most players do not have so they will choose to chase on foot which gives you an advantage
- If you see a red nameplate appear then quickly disappear it is likely an opponent is trying to sneak attack you (run in the opposite direction)
Gear Up for PvP
Not all weapons are created equal. Some are high damage, single target. While others stun but strike slowly. Being alone in a PvP zone is not the time to whip out your gathering gear. You need a decent set of armor as well as an efficient weapon to ensure you don’t get clapped on.
It is impossible to describe each weapon and its benefits in this section. We did some research, and have found some weapons to be better than others in PvP scenarios. None of these weapons guarantee success in the solo venture. You will have to become familiar and find what fits your playstyle best. Below are four weapons we have found success with:
- Bloodletter – This weapon will give you two mobility abilities to get away from attackers
- Mistcaller – This offhand can be paired with the Bloodletter and will greatly reduce your cooldowns which will allow your escape abilities to come back sooner.
- Grovekeeper – Or what I call the Peacekeeper… This hammer is slow, but at higher levels offer AoE stunning skills that render all players within the attack immobile for many seconds allowing you to strike hard and fast, turning the tables on a group of gankers
- Permafrost Prism – a mage weapon that uses ice powers to slow and stun, paired with the right gear (plus potions and food) this weapon merges the best of two worlds, high damage output with crowd control
How to Maximize Gathering Yield
For those who want to maximize their gathering yield, there are a few ways to do so. Food, gear and tools can aid in taking advantage of the resource spawns you are hunting for. Giving you more resources gathered for less time spent farming.
Consume Pies
Pies are food consumables that are best suited for gathering. All pies, chicken, goose, and pork can be either purchased in the market or crafted to increase your maximum load capacity and gathering yield. Pork Pies are my favorite because they increase gathering yield by 15% and load capacity by 30% for 30 minutes. I like to bring two out with me so I have a full hours worth of food. Pork Pies are the most expensive, so if you want something less pricy, go with the chicken or goose pie. The cost reflects the effectiveness, these cheaper pies won’t offer the same perks.
Pick a Resource Type to Farm
Choose one resource type and stick with it while you are starting out, especially if you’re trying to maximize your output and income. A resource type meaning, stone, wood, ore etc.. This is important because better, more expensive resources will require higher-tiered tools to gather. Making your gathering time more valuable. I personally started with focusing on hide because I wanted to stick with the skinning knife and get to the rare hides for a better return on investment.
Wear Gathering Gear
This gear is going to increase your load capacity and increase your yield for the given resources you’re focused on gathering. Gathering gear includes a hat, body, shoes, and backpack.
The type of gear depends on which resource you want to gather. Gathering gear is specific to the gathering profession. Choosing to gather stone, for example, you would need the Quarrier gear and this gear would only provide perks for gathering nodes that require the Stone Hammer.
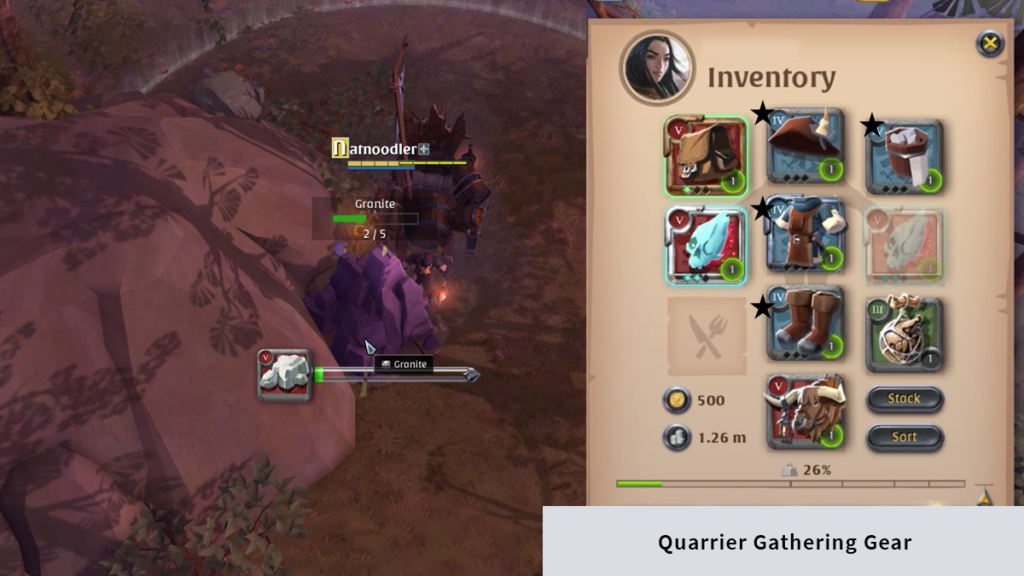
Keep in mind this will paint a target on your back since you are seen as less of a threat. If you don’t mind potentially having less damage to defend yourself in PvP, wear gathering gear. If you have friends that can protect you, wearing the gathering gear is a no brainer. Being solo, on the other hand, full disclaimer, you could be risking your life so maybe only wear the special gear in yellow zones where the death loss is not so detrimental.
Use Potions
Just like food, potions offer some unique utilities for the tasks at hand. Bring Sticky Potions to make it harder for your attacker to catch you. The potion of invisibility will make you invisible for a sneaky getaway and so on. Pick a utility you find most valuable and use it while out and about.
Fast Mounts vs Load Capacity Mounts
Load capacity mounts (Ox, Mammoth) are great for gathering but are slightly slower. The trade is the capacity to carry more goodies, but if you are too slow to get away, your goods are gone anyways. Another important fact is that mounts contribute to weight. So, the horse mount will add weight to your overall capacity, where the Ox or Mammoth actually lightens the load.
For those looking to solo farm in the red and black zones, don’t fall into the Ox load capacity trap. Yes it holds more but you’d be better off getting a horse, stag, or salamander for a speedy getaway. I prefer a riding horse above tier 4 which is fast enough to help you outrun most gankers but cheap enough to not break the bank if you die and lose it.
Use Higher Tier Bags
Craft or buy a bag of tier 4+ from the marketplace to increase your weight capacity. Having a better bag gives you more weight capacity without needing the transport mounts. Don’t get me wrong, the mounts hold much more, but a better bag is a good trade in order to keep the mobility and speed of a faster mount.
Use Good Boots
Find yourself a nice pair of boots that offer either speed increases, or cleanses that fear mobs off of you. These skills don’t seem like much but could make all the difference when needing to quickly evade a gank.
Risky Reward
Sign up for local faction before you go out to gather and every time you gather you’ll get faction points (you will have to worry about other factions if you do this).
Sell Crude Resources
When first starting out, lower-tiered resources are more valuable in their original form. In most cases, you’ll make more silver in the beginning by selling crude resources like rugged hide instead of refining into stiff leather. Not sure why this is, it may only be my city, at the particular time of day I play, but this is something I noticed. It may also be simply because players run the marketplace, and will reduce the cost of an item in order to sell it quickly regardless of the math behind selling something for its proper value. Either way, check the market before you sell to maximize profit margin.
View Zone Resources
Chart your path to the resources you desire by first checking each zone for the resources they offer. While inside a zone press ‘N’ to view the resources available in your area. To check other zones, open the map ‘M’ and click into a city, the same N menu will appear for the zone selected and you can view the resources available in the top right corner.